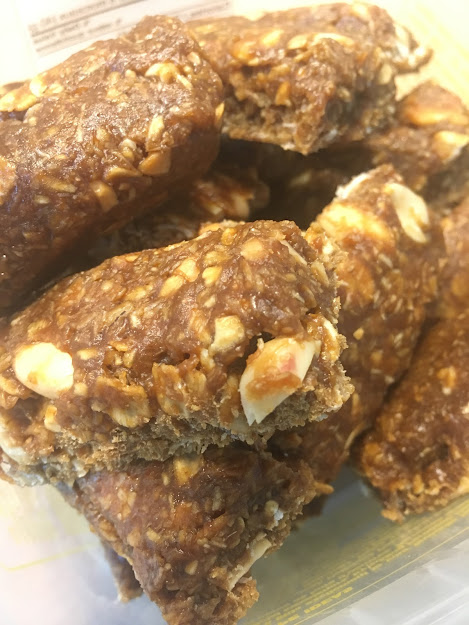
The right salt makes all the difference. That is to say, refined 'table salt' doesn't do your body any good, and doesn't do flavour much good. Himalayan salt, or any other simple earth salt will usually do the trick. I don't get fancy with it. Remember when we all used to be all about the sea salt? Unfortunately, because of the high concentration of minute plastic particulate in the oceans, sea salt has become a bit of a risky proposition.
This is my long winded way of saying that these granola bars are absolutely epic, but inadequate salt will be their downfall. In my opinion, any dessert or snack that involves peanut or almond butter will absolutely beg for a little salt.
I grew up in a house that eschewed salt under the umbrella of health-consciousness. I was once made to feel like a sinner for attempting to sprinkle a couple grains of table salt on a slice of cucumber. However, rest assured, renegade bakers, earth salt will not cause you the problems associated with refined salt. I do urge you to use it as an enhancer, not as a flavour on its own, but I don't think you need to be shy. Other things also bump up flavour -- a shot of acid (in this case, apple cider vinegar) some other layers of mystery and nuance (hello, tonka bean powder, vanilla, cinnamon). But without our old friend NACL, even these tricks will fall flat.
Toasting the oats, and then the coconut, before combining ingredients will elevate these little bars, and the combination of ingredients give them a bit of a caramel hit. My partner is a pretty big fan, and finds them to be a very satisfying snack when he needs something to keep him going.
Finally, use the highest quality raw ingredients you can -- these will still be loads more economical than any box of granola bars you can buy.
equipment needed:
whisk
mixing spoon
mixing bowls
scraper
measuring spoons
measuring cups
square silicone pan or glass/metal pan lined with baking parchment
a square of baking parchment (used when pressing the concoction into the pan)
microwave (or use a double boiler on the stove if you prefer)
microwave safe bowl (I use a pyrex measuring cup)
spatula or other dull edge
ingredients:
A)
1/2 cup coconut nectar
1/2 cup natural peanut butter (I used crunchy, the organic one made by Nuts To You because it's awesome)
1 tbsp molasses
1 tsp vanilla extract
1 tbsp apple cider vinegar
20 g cocoa butter (I have cocoa butter pastilles that I can melt to use in baking and confection. Pastilles or chips will be easier to use than large chunks just fyi)
B)
1 1/4 cup oat flakes
1 1/4 cup fine desiccated coconut (unsweetened)
2 tbsp date powder
1/2 tsp himalayan salt
1/2 tsp tonka bean powder
C)
1/2 cup dry roasted, salted peanuts (I buy blanched organic peanuts, toss them with water and himalayan salt, and then oven roast them on a low temperature, often further dehydrating them overnight on the lowest temperature in the oven)
directions:
1. in a large skillet on the stove, dry toast the oat flakes until lightly browned, and then remove to a large bowl.
2. dry toast the coconut in the skillet until lightly brown. This will happen very quickly so don't take your eyes off it. Add to the large bowl
3. add the date powder and salt, mix well, and set aside.
4. In a microwave safe dish, combine the ingredients from part A, and heat them in the microwave until they can be easily whisked together. Mix really well.
5. pour the part A concoction over the part B melange in the big bowl, and mix well.
6. finally, add the roasted peanuts, and stir them in.
7. press the resulting mixture into your square pan -- I use silicone because it's very easy to work with. If you prefer pyrex or metal, please make sure you remember to like it with baking parchment!!
8. cover the mixture in the pan with a piece of parchment so you can press it down really well. I sometimes also use an extra silicone mat for this step. That works too.
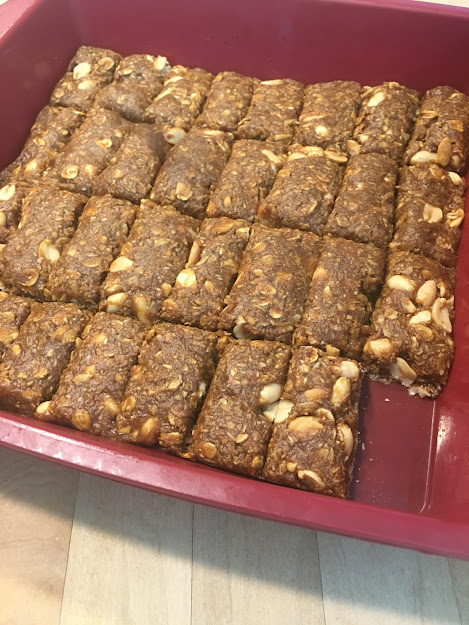
9. once the mixture has been pressed down and looks tidy and flat, you can score bars using a dull edge like a spatula. You don't want to cut through the parchment or cut the silicone mat.
10. allow to fully cool, then chill (i flash chill in the freezer)
11. when chilled, remove from pan and break apart along score lines. Store in an airtight container in the fridge.


No comments:
Post a Comment